BMW Airhead oil filters
Changing the oil filter is normally a simple task but there are a few places where you can go wrong due to idiosyncracies in BMW's designs. Here's a brief run-down on the designs and the things you need to look out for.
Covers
There are three basic oil filter cover types.
Flat cover - /5 and /6
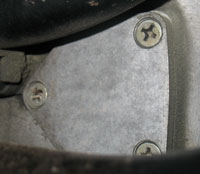
This system is specific to the 1970 through 1976 models. The cover is truly flat and uses a cover gasket to seal the crankcase. Underneath the flat cover is another cover which seals the filter canister itself, and is held on by a central bolt. This design uses the short oil filter, and does not use the white O-ring.
Early flat covers had countersunk flat-head screws, as shown. By the end of 1970 they were using regular 10mm bolts without countersinks.
Other than the filter, the parts for this design are unique although the entire system (canister/tube/cover) can be replaced with a newer one (for example, if you need to add an oil cooler). BMW apparently sold an upgrade kit for a while which replaced these parts with the recessed cover design.
Note: the later covers will not seal against this early canister, so you will never develop oil pressure. You must replace all three components if you replace any.
Starting with the 1977 models the entire system changed. The inner cover was eliminated and the canister and outer cover were changed so that they sealed against each other with the white O-ring.
Recessed cover.
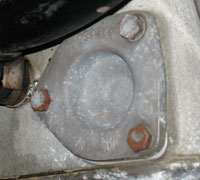

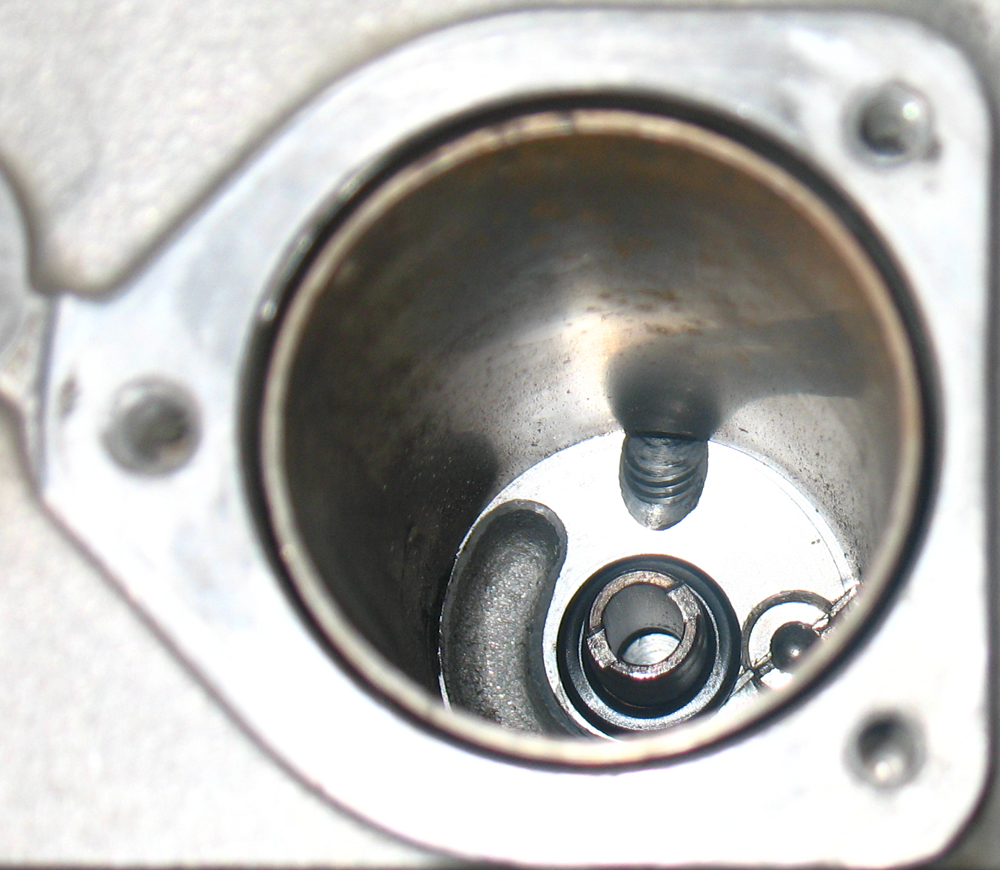
The recessed cover seals the engine case and the filter housing at the same time. The white O-ring is what actually seals the canister from the case. This takes the short filter.
With this design and with the cover for the cooler-equipped models, you should check the depth of the canister below the case to make sure you are assembling the system with the correct amount of compression on the white O-ring. Unfortunately the engines were not all assembled with the same dimensions and that variation makes a difference to how you install the cover after changing the filter. See Canister Depth below.
Oil cooler cover
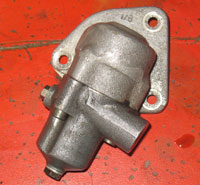
Coolers were used on some R100 models. With two hose fittings on it, there are thermostat (RS/RT/Classic) and non-thermostat (GS/R) versions. This takes the long filter, and seals using the white O-ring the same way the recessed cover does.
Filters and filter kits
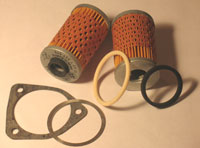
11 42 1 337 572, 11 42 1 337 198 - short (about 119mm) solid filter, Purolator PL-16 or Mahle OX35. NLA, replaced by:
11 42 1 253 919, 11 42 1 337 570 - short hinged filter OX37, with a rubber sleeve at each end.
11 42 1 335 385 - long (about 134mm) straight filter, NLA, replaced by:
11 42 1 337 575 - long hinged filter OX36, with a rubber sleeve on the inside end. The cover provides the seal on the outer end using the black square-section O-ring which comes with the filter.
11 00 9 056 145 - short (non-cooler) filter kit, with short hinged filter, drain plug crush washer, white O-ring, shim, and cover gasket. The cover gasket is used for flat covers and on some recessed covers, and the white O-ring and shim are only used for recessed covers.
11 00 9 056 146 - long (cooler) filter kit, with long hinged filter, the other components listed above, and two small crush washers for the thermostat (if present).
Note: Although all BMW filters now come with the inner O-ring attached, early filters had separate O-rings in the inside. It's worth checking your bike to make sure there isn't an O-ring living at the base of the stub pipe.
There will be a black square-section O-ring at each end of every filter. The inner one will be small, and the outer one will be small on the short filter and large (fitting into the cover) on the long filter. This O-ring doesn't seal off any particular pressure; it just keeps oil going through the filter rather than around it. Think about it; the filter is porous so there's a limit to how much pressure the O-rings will ever see (the oil will just go through the filter instead) unless the filter gets very clogged.
How it all works

thermostat cover.
The basics of this system are: The oil pump pressurizes the canister, and oil is forced through the filter from the outside to the inside. Oil then travels down the central pipe and out to the bearings.
It's slightly different with a cooler cover, where the much longer center pipe extends into the cover. With the thermostat cover (shown left), the outer hole is open to the inner hole at low temperatures, allowing oil to make a U-turn inside the cover and go back out the pipe. As the thermostat opens, some oil is allowed to go out to the cooler.
With the non-thermostat cover (shown a few paragraphs down), oil is pushed through the larger hole, out to the cooler, and back to the pipe. Oil flowing through the smaller hole bypasses the cooler. As the oil warms up it will flow better through the cooler. It's pretty hard to push cold oil through those coolers, thermostat or not. On '88 and '89 GS models, the small hole was 2mm. This should be drilled out to 4mm (like the later bikes) to reduce peak oil pressure in the cooler.
A diagram of the system is on the canister page.
Note: the longer center pipe for the the cooler should extend 3mm past the surface of the case, to ensure that it protrudes into the center hole of the cover.
Canister depth

The depth of the canister below the face of the engine case should be periodically checked. You can do this easily using the depth function of a typical caliper. This depth determines the amount of space that the O-ring will occupy when the cover is installed. Different mechanics shim the O-ring differently, but they generally leave between 3.2mm and 3.8mm for the O-ring, which is 4mm thick uncompressed. Using a cover gasket increases the space by 0.45mm, and using a shim decreases the space by 0.3mm. Look here for excessive details on how the O-ring works and how to compress it.
Early bikes had sharp edges on the canister, which means that you have to use the shim to protect the O-ring. Later on, the canisters were made of thinner metal with a rolled edge. This increased the width and kept the O-ring from being cut; on those models, the shim is only needed as a dimensional adjustment.
At the right is a typical filter installation on a cooler-equipped bike. Just the filter, with the small rubber sleeve on the inside and nothing on the outside, and the metal shim over the edge of the canister. No gasket.
Installing the white and black O-rings
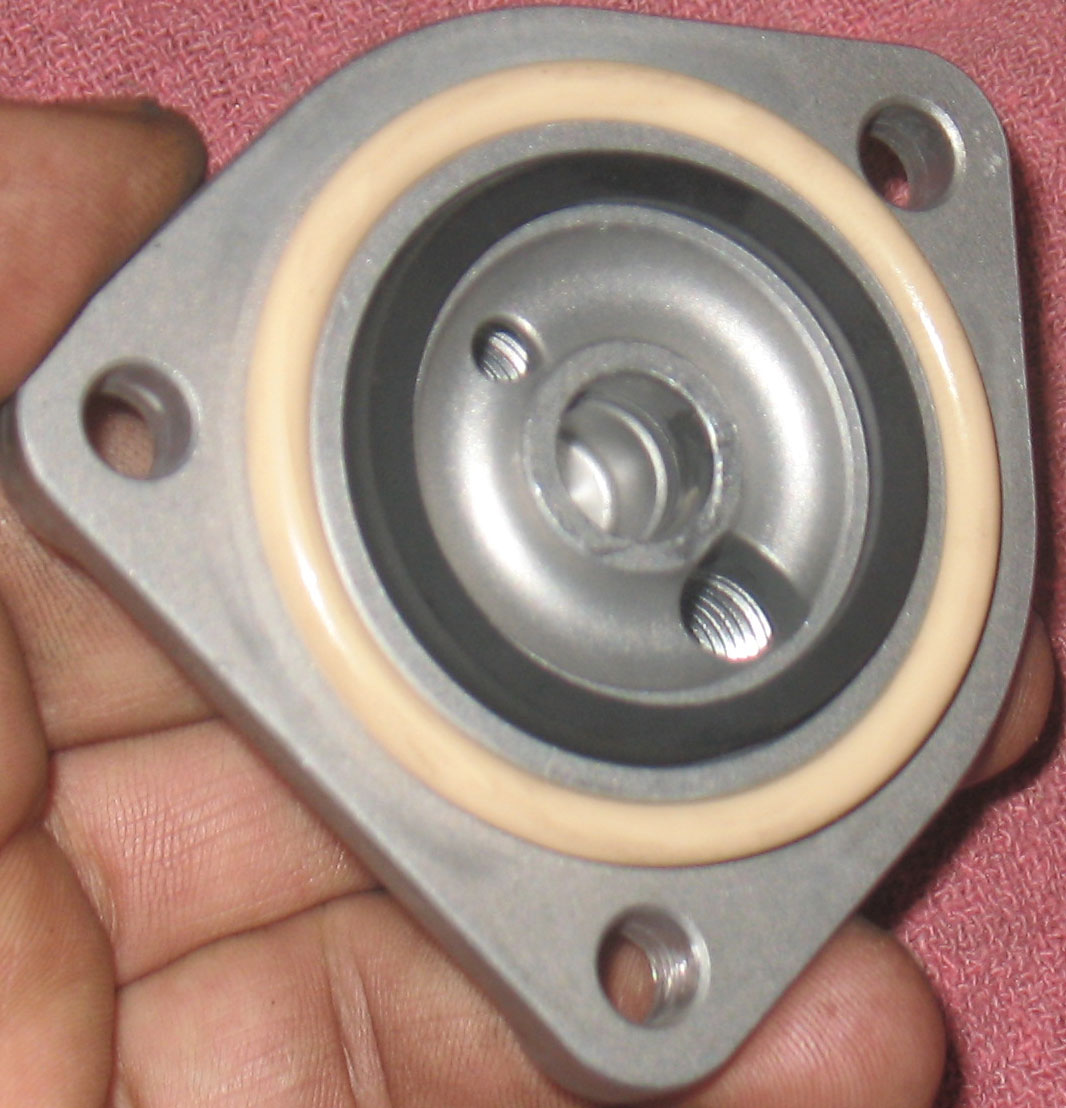
On the cooler-type covers, it's very easy to pinch the white O-ring. The resultant cut will cause a pressure leak, but it might not happen for quite a while.
Simply apply both O-rings to the cover and install them that way. If you try to put the white O-ring on the canister lip, it will be slightly compressed and therefore fatter, but if you put it on the cover it will be slightly stretched and therefore thinner. The interference is technically the same but installing on the cover just works better. Move the cover into position, carefully press inward while wiggling slightly, and then rotate as needed to get the bolt holes to line up. It should slip most of the way into position with minimal hand pressure.
In this picture I have removed the cover from the cooler lines, but normally that isn't necessary. With a short filter, you won't have the black O-ring shown and the recessed cover is shaped so that it will be less likely to cut the O-ring.
Converting between cooler and non-cooler systems
Coolers were generally used on faired and later unfaired R100 models. If you add a fairing or a sidecar, or increase the displacement of a motor, you might want to add a cooler. Likewise, you may want to remove it for some reason. Some people feel the extra plumbing is a vulnerability.
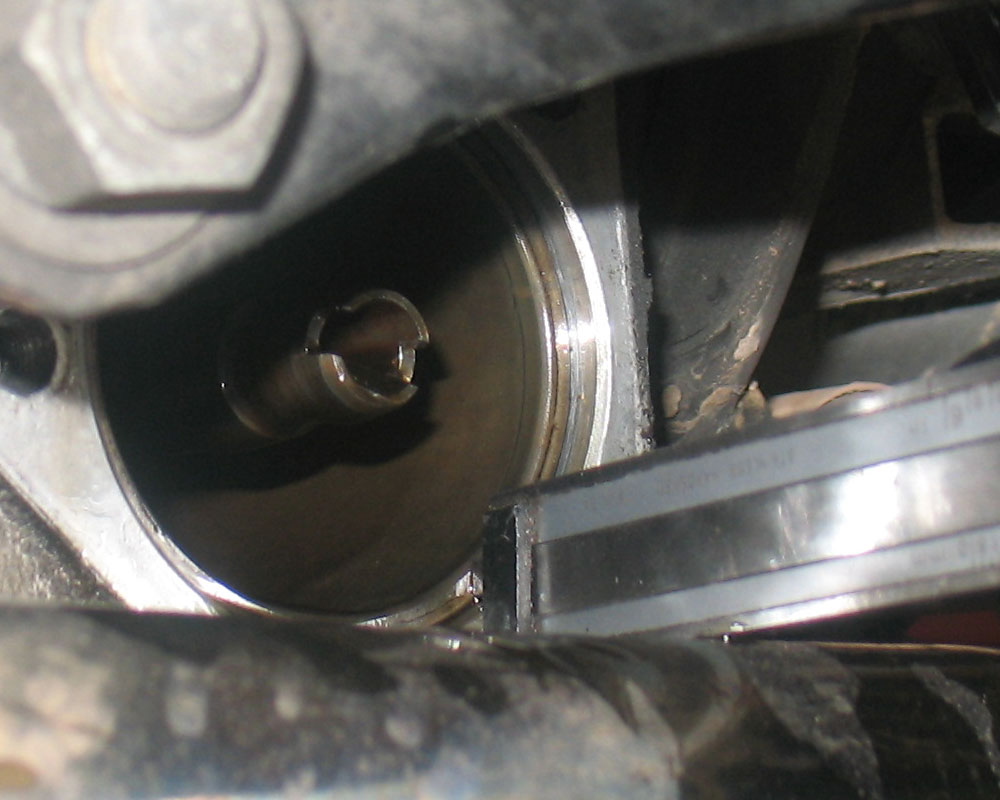
For a recessed-cover bike, all you need is the correct cover, filter, and stub pipe inside the canister. On flat-cover models you need to replace the canister as well. There is a slot in the end of the pipe which will accept a large screwdriver. It would be easiest to change when draining the oil on a hot engine; apply additional heat to the opposite side of the engine casing with a torch, and use the screwdriver (with a wrench if needed) to unscrew the old stub.
Replacing the canister, if needed, will be more difficult. New canisters come with a rolled edge and must be inserted to the proper depth.
Pressure-relief valve and oil filter bypass valve
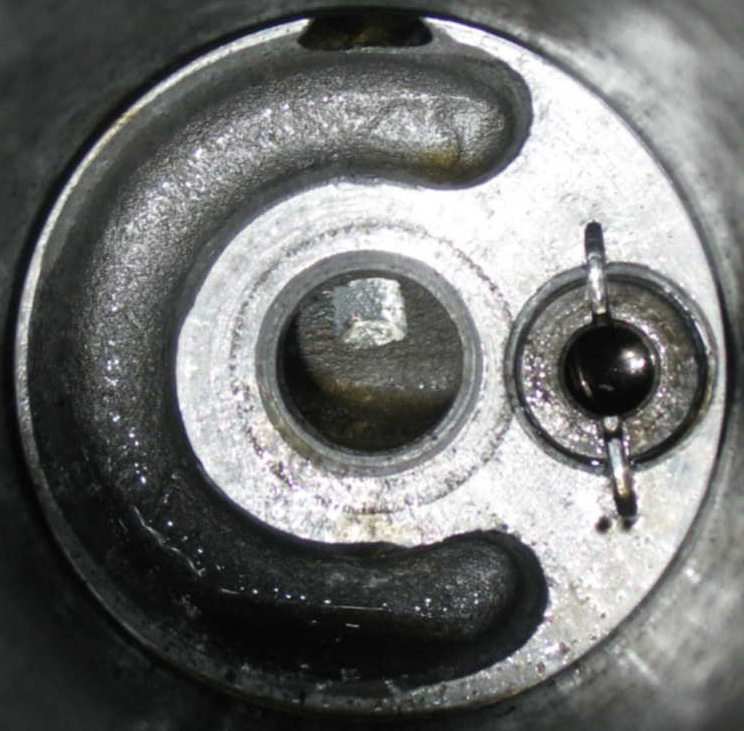
The oil pump will pump more oil than the engine can use, so there is a valve mounted on the front of the engine (at the top of the front main bearing carrier) which dumps excess oil out onto the timing chain.
At the bottom of the filter housing is a spring-loaded ball valve which allows oil to bypass the filter if the pressure gets too high. In this case, unfiltered oil will be sent to the engine. When the engine is cold, oil will normally flow through this bypass. If the bypass valve breaks, oil will flow through here when the engine is wrm also. Shown to the right is a broken bypass valve; the owner noticed that the cooler was never getting hot. The problem was that oil was not being directed through the filter at all, and therefore was not going into the cooler (see canister page for a diagram of how that works).

